
In today’s security landscape, identity management and multifactor authentication (MFA) are crucial components. The latest release of vSphere, vSphere 8 Update 1, introduces support for cloud-based identity providers in vCenter, including the widely used Okta service.
With this new capability, vSphere administrators can leverage modern identity management features for enhanced security and streamlined operations.
Prerequisites
Okta requirements:
- You are using Okta and have a dedicated domain space, for example,
https://your-company.okta.com. - To perform OIDC logins and manage user and group permissions, you must create the following Okta applications.
- An Okta native application with OpenID Connect as the sign-on method. The native application must include the grant types of authorization code, refresh token, and resource owner password.A System for Cross-domain Identity Management (SCIM) 2.0 application with an OAuth 2.0 Bearer Token to perform user and group synchronization between the Okta server and the vCenter Server.
- You have identified the Okta users and groups that you want to share with vCenter Server. This sharing is a SCIM operation (not an OIDC operation).
Okta connectivity requirements:
- vCenter Server must be able to connect to the Okta discovery endpoint, and the authorization, token, JWKS, and any other endpoints advertised in the discovery endpoint metadata.
- Okta must also be able to connect with vCenter Server to send user and group data for the SCIM provisioning.
vCenter Server requirements:
- vSphere 8.0 Update 1
- On the vCenter Server where you want to create the Okta identity source, verify that the VMware Identity Services are activated.
Networking requirements:
- If your network is not publicly available, you must create a network tunnel between your vCenter Server system and your Okta, then use the appropriate publicly accessible URL as the Base Uri.
Step 1: Create the Okta OpenID Connect Application
First we need to create the OIDC – OpenID Connect on Okta side.


Select OIDC – OpenID Connect as the Sign in method and Native Application as the Application type

We need to enter a name for the OpenID Connection application and in the General Settings section
– leave Authorization Code checked
– check Refresh Token
– check Resource Owner Password
For now we will ignore Sign-in redirect URIs and Sign-out redirect URIs

We can select Skip group assignment for now and Save our settings.

No we need to navigate to the General tab and in the Client Credentials click Edit
– for Client Authentication check Client Secret
– for Proof Key for Code Exchange (PKCE), uncheck Require PKCE as additional verification
and click Save

The Client Secret is generated, we should now copy both the Client ID and Client Secret and save them for use in creating the Okta identity provider on the vCenter Server system.

No we can assign groups or users to our OpenID Connection application.
In the Assignments tab just select Assign to Groups from the Assign drop-down, select the group and click Assign.

Step 2: vCenter Server Okta Identity Provider Creation
Log in as an administrator to vCenter Server and navigate to
Home > Administration > Single Sign On > Configuration.

Click Change Provider and select Okta

The Configure Main Identity Provider wizard opens, now we need to review the Okta and the vCenter Server requirements and click Run Prechecks.
!!If the precheck finds errors, click View Details and take steps to resolve the errors as indicated!!

In the Directory panel, we need to enter the following information:
– Directory Name: Name of the local directory to create on vCenter Server that stores the users and groups pushed from Okta
– Domain Name(s): Please enter the Okta domain names hat contain the Okta users and groups you want to synchronize with vCenter Server. If we enter multiple domain names, we need to specify the default domain.

In the User Provisioning panel, we need to select the duration of the token lifespan and then click Next.

Within the OpenID Connect panel, we need to enter the following information:

– Redirect UI: This will be filled automatically
– Identity Provider Name: This will also be Filled in automatically as Okta
– Client Identifier: Obtained when you created the OpenID Connect application in Okta

– Shared Secret: Obtained when you created the OpenID Connect application in Okta

– OpenID Address: For example, if your Okta domain space is mylab.okta.com, then the OpenID Address is –> https://mylab.okta.com/oauth2/default/.well-known/openid-configuration
In the last step, we need to Review the information and click Finish.

The Okta identity provider on the vCenter Server is now created.

Before we move to the next step we need to Copy the Redirect URI,

Generate a Token and Copy this one as-well.

Step 3: Update the Okta Redirect URI
After we have created the Okta identity provider configuration on vCenter Server, it is now time to update the Okta OpenID Connect application with the Redirect URI that we copy from the
Okta Identity Provider Configuration page in vCenter Server.
Within the General Settings screen for the OpenID Connect application created, we need to click Edit.
And in the Sign-in redirect URIs text box, we need to paste the copied Redirect URI from vCenter Server.

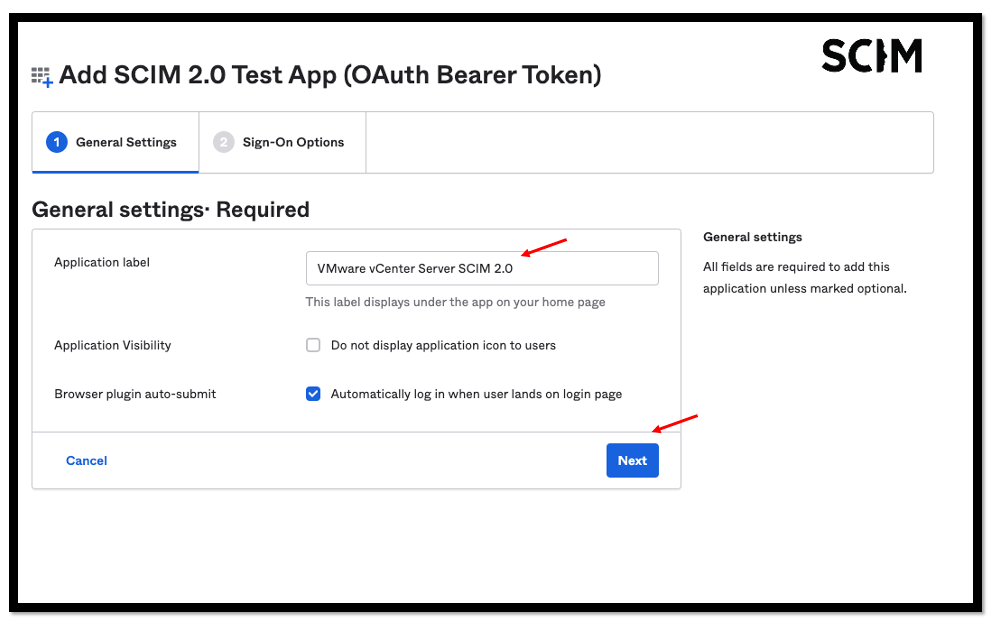
Step 4: Create the SCIM 2.0 Application, Push Users
and Groups to vCenter Server
In the next step we need to create a SCIM 2.0 application on Okta that will enable us to specify which Active Directory users and groups to push to vCenter Server.
In the Okta Admin console browse the app catalog

for SCIM 2.0 Test App (OAuth Bearer Token)

and click Add Integration

We need to enter a name for our SCIM 2.0 application
Moving to the Sign-on Options page:
– we leave SAML 2.0 checked

For Credential Details select the following

Now it’s time to assign users and groups to the SCIM 2.0 application to push from your Active Directory to vCenter Server.
1. In the Okta SCIM 2.0 application, under Provisioning, click Configure API integration
2. Check the Enable API integration checkbox.
3. Enter the SCIM 2.0 Base Url
4. Enter the OAuth Bearer Token
5. Leave Import Groups selected
6. Click Test API Credentials to verify SCIM credentials
7. Click Save to finish

To be able to provision users we need to:
– Select the Provisioning tab and select To App, then click Edit
– Check Create Users, Update User Attributes, and Deactivate Users.
– Do not check Sync Password
and click Save 🙂

Now we can assign our Users and Groups, select the Assignments tab and select Assign to or Assign to People from the Assign drop-down.

To push groups, select the Push Groups tab and e.g.
Find groups by name: Select this option to locate groups by name.

Step 5: Configure group membership in vCenter for Okta Authorization
In the last step we must configure group membership before Okta users can log in to vCenter Server.
So logged in the vSphere Client as a local administrator, we need to navigate to Administration >
Single Sign On > Users and Groups


Click the Administrators group

and the click Add Members

Here we need to select the domain name of the Okta group, that we want to add from the drop-down menu. (! In my example it is internal.euc-stuff.de !)

Select your Okta group, add it to the Administrator group and click Save.

Demo
Now we are finally done and let us look like how cool this is working and looking like.
Hope you like this guide and my short demo and happy configuring 🙂
 IAMSE
IAMSE
You mentioned everything nicely except when it comes to the part where if your vcenter is not publicly available and creating the tunnel part! that’s the piece I’m struggling with and is not clear neither here nor in VMware docs. Was your vcenter here open to public? can you please provide details on scenario where vcenter is not public?
Hey Armen, thanks for your comment and question. My vCenter Server is open to public via a Firewall and some NAT-Rules in place. It is also very important o have a valid public cert in place to have all the things running like described in my blog.
Thanks
Arkadiusz
Hello Arkadiu
Once i configured i am getting upstream error with Okta SSO but when i login with local account my vcenter works fine any idea/help
This is great work, we followed this to configure a Proof of Concept for our vCenter to work with OKTA authentication, we’ll be rolling out in production soon.
In our case we did not want to NAT our vCenter through the firewall so OKTA could provision via SCIM directly. But you can manually drive the user/group management in vCenter via SCIM directly yourself, in form of a script or just manually, you can find some examples here: https://geekmungus.co.uk/?p=3990
The key thing we found was to ensure that the SSO user you created via SCIM has the externalId attribute specified and that matches the nameId attribute for the user account from OKTA.
How do you establish said network tunnel with Okta? Is there an Okta option to do so ? Is it something on the firewall side? Like the how is my biggest question for the SCIM part.
I am performing the configuration following your post but I got stuck in step 4:: Create the SCIM 2.0 Application, Push Users and Groups to vCenter Server
To be more exact where you indicate to put a token: 4. Enter the OAuth Bearer Token
I would appreciate if someone can help me where to get that token to place, try placing the Clients secret and secret token without favorable results.